Scanning disks
Insert the disk you would like to scan in the disk drive.On the Disk menu, select Scan (Ctrl-S) or click the butt
Note: If your computer has more than one CD-ROM drive, the program will prompt you to select the device to use.
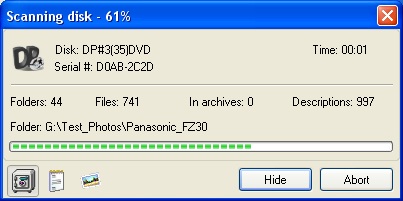
The Scanning progress window will appear; it displays the following information on the status of scanning:
- Type of object being scanned (disk / folder).
- Label and serial number of disk being scanned.
- Time of scanning.
- Number of scanned files and folders.
- Number of files in archives.
- Number of extracted descriptions.
- Current folder.
- Percentage of the total volume of files to be scanned (does not reflect folders).
In the lower-left corner of the program window, there are three switch-buttons for quick switching of the scanning settings:
While scanning a disk, you can use these buttons to quickly turn off saving unnecessary data to save disk space or, the other way around, turn on the options that you need.
To continue using the program, click the [Hide] button. The scanning process will not be interrupted. Once the scanning is complete, the notification will be displayed on your screen. Click [OK]. If you select the item "Open CD-ROM drive", the program will open the drive for you to swap CD disks. This feature is recommended for scanning a great number of disks.
Upon the successful completion of scanning, the disk properties window will appear. Enter information on the disk as necessary and click [OK].
If necessary, the scanning process can be interrupted by clicking on the [Abort] button in the Scanning progress window.
Use the settings window to change the scanning options for extracting descriptions from files.
When the option "Suggest scanning unknown disks" is selected (default), the prompt for scanning appears automatically when an unknown disk is available in the drive.