Installing and Configuring Clients Using Group Policies
Domain Group Policy Creation
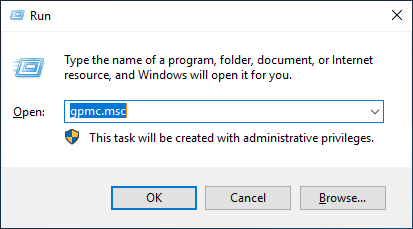
- On the domain controller, start the domain group policy editor Start - Run... -
gpmc.msc (or use the keyboard shortcut Windows+R - gpmc.msc).
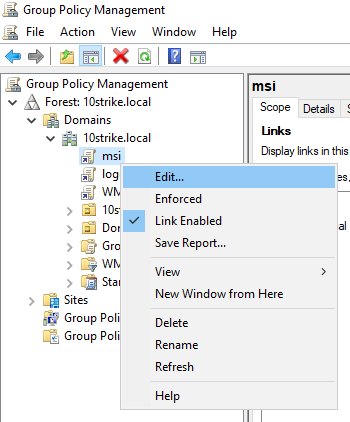
- Find the policy "Default
Domain Policy" on the opened window (we renamed it to msi for convenience or create a new policy named msi) and click on it with the right
mouse button, then click Edit...
- Go to the "Computer Configuration - Policies - Software Configuration - Software Installation" policy
- Right-click on Software installation, then click
New - Package... using the context menu

- Select the Client's .msi package (client.msi) located in a folder opened for public access (in a share) with the read-only access for all.
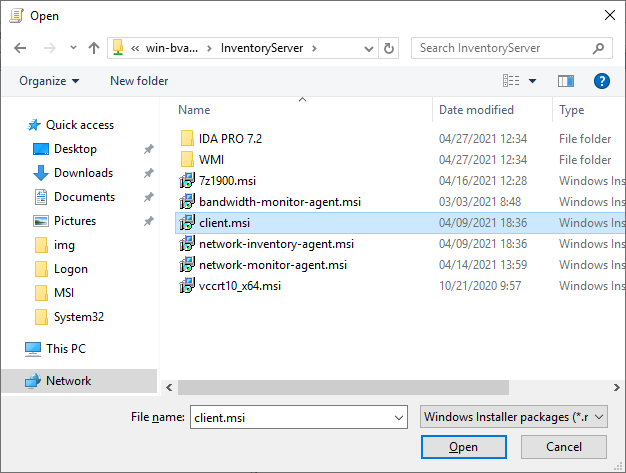
The client.msi installation package and other Client files are stored in the main application's folder, in the Client sub-folder: C:\Program Files (x86)\10-Strike Network Inventory Explorer\Client. Copy it to the share from this folder.
On this step, you can also add the default client configuration file data.cfg to the share.
How to prepare the data.cfg configuration file for Clients
a) Run the NIEClientCFG.exe application that is stored in the main application's folder, in the Client sub-folder: C:\Program Files (x86)\10-Strike Network Inventory Explorer\Client
b) Configure the Client application settings: select the necessary configuration items to be collected and the data pushing method (copying to a share / sending to email / sending to FTP), configure other options like the time interval for automatic updates, and specify credentials for email/FTP.
c) Close the application and the data.cfg file will be saved in the Client sub-folder where the NIEClientCFG.exe is located with other Client files.
If you skip this step now, you can add the data.cfg file later to the client folders on user computers using group policies. For that, copy the pre-configured data.cfg file to the Client app's destination folder where it will be installed on your computers: C:\Program Files (x86)\10-Strike Network Inventory Client.
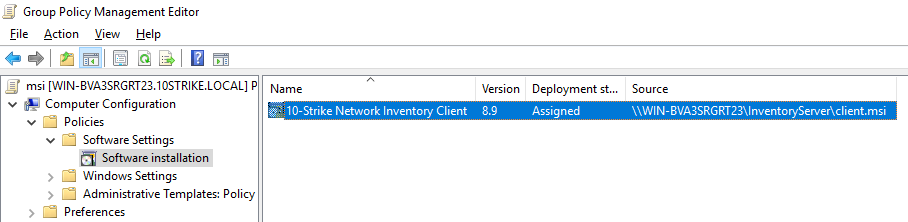
- After adding the package to the policy, you will see the added package on the right window panel
Reinstalling Client
If you decide to reinstall the client for some reason, you need to:
- Remove the client via the "Uninstall programs" snap
- Manually clean the registry:
- Delete the registry key {eaf7426e-7bcb-440c-b7fa-ad47a6701181} for Windows 7 or {ddd787ca-3886-44c3-bab8-98660bc6bd73} for Windows 10 in HKEY_LOCAL_MACHINE\SOFTWARE\Microsoft\Windows\CurrentVersion\Group Policy\AppMgmt\
- Delete the registry value REG_DWORD {caee571d-646d-4fdb-8025-8eed7e5ae240} in HKEY_LOCAL_MACHINE\SOFTWARE\Microsoft\Windows\CurrentVersion\Group Policy\AppMgmt\
- Install the Client again.