By default, the program's built-in web interface operates over the non-secure HTTP protocol. This means that the transferred data can be easily captured and viewed. This data includes the IP and MAC addresses of your monitored devices, names and locations of your switches, the program's event log, parameters of your checks, etc. If you access the web UI over your private local network where all users have access to this data, you do not have to worry about this.
However, if you want to access the web interface using public networks (Internet), you will definitely need to use the secure HTTPS protocol for accessing the information using your web browser (or use VPN). The HTTPS protocol uses the data encryption for the transferred data. The encryption uses a key and the certificate provided for the domain name by a certificate provider. The certificate has a digital signature protecting it from falsification.
Working with Web Interface over Secure HTTPS Connection with Our Self-Signed Demo Certificate
The program's web server (Jetty) is already configured for working with HTTPS. By default, the secure connection port is available at the TCP port 8443 which can be modified in the Jetty configuration file etc\jetty-ssl.xml (the jetty.ssl.port parameter).
For moving the Jetty web server to the HTTPS protocol operation, open the c:\Program Files (x86)\10-Strike Network Monitor Pro\web\ folder, rename the start-https.ini file to start.ini (before that, you can rename the existing older file start.ini to start-http.ini in order to save it), and restart the service called Jetty Service in the Service Management Console.
Start a web browser and open this link:
https://localhost:8443/netmonitor/
The provided certificate is self-signed (i.e. it is signed by us, not by an official certificate provider). This demo certificate was generated by the open-source openssl.exe tool. This certificate is suitable for the demonstration needs (so you can try the HTTPS function) and it should not be used in non-secure networks because it is not secure. However, if you do not have your own certificate for your domain name and company, you can use this certificate in the local network. You will also need to add this certificate to your browser's list of exceptions to avoid errors and blocking.
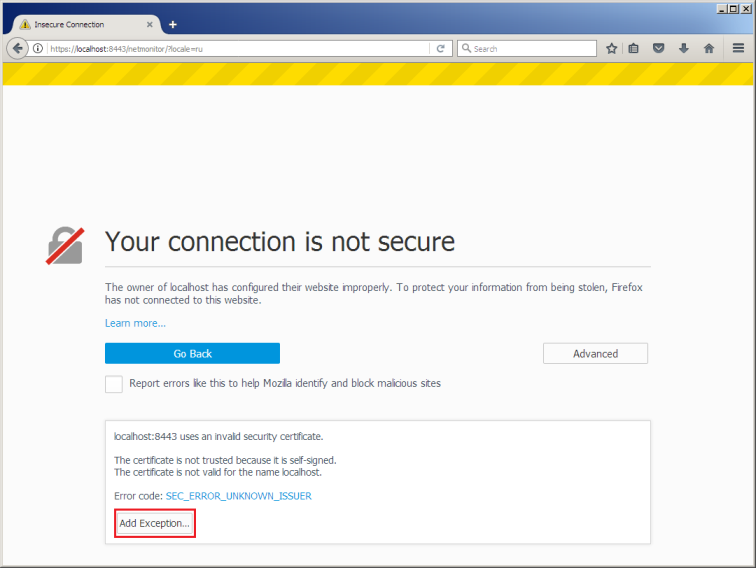
How to do this. When you are trying to access the web UI's URL, the browser will display a warning about the connection security. Perform the following steps to avoid getting these warnings in future (on Mozilla Firefox example):
- Click Advanced.

- Click Add Exception...
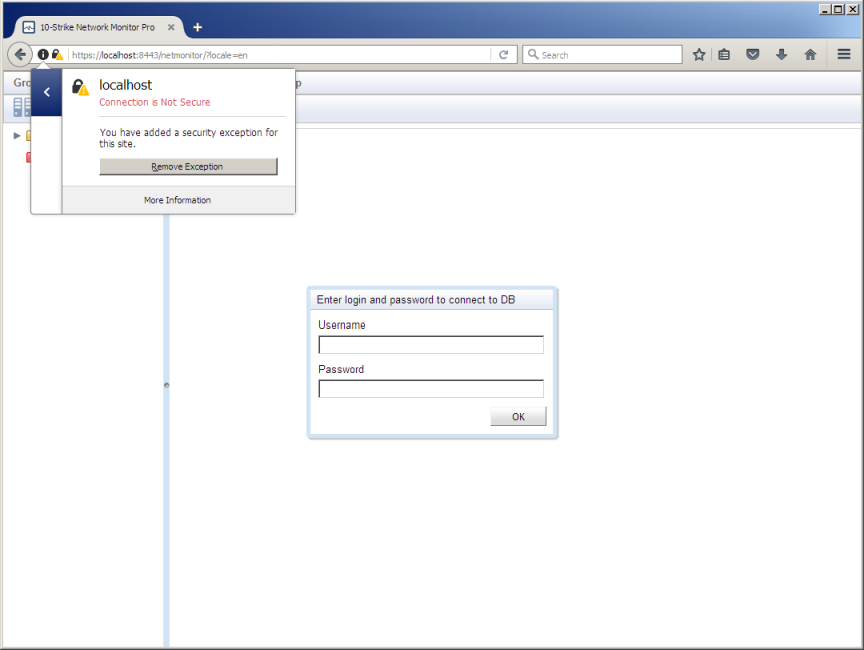
- On the displayed window, click Confirm Security Exception.

After that, your browser will continue loading the web UI and you will be able to work with it over HTTPS in the way like you have a normal certificate installed. The web browser will continue consider the connection as not secure because it cannot check the certificate's validity.
Warning! Please do not use the demo certificate (or other self-signed certificates) for accessing the program's web interface over public networks (through the Internet).
Installing Signed Certificate in 10 Steps
If you have your own domain certificate you can attach it and use with the program's web UI. Perform the following steps:
- Your certificate provider should provide two files to you: 1) the signed certificate file (.crt) and the key file (.key).
Copy these files to the c:\Program Files (x86)\10-Strike Network Monitor Pro\web\Certificate\ folder and rename them to jetty.crt and jetty.key accordingly. The jetty.crt file should be in the PEM format. I.e. it should look like this (if you open it in a text editor):
-----BEGIN CERTIFICATE-----
MIIDzDCCArQCCQCXtcBm22AETzANBgkqhkiG9w0BAQQFADCBpzEbMBkGA1UEChMS
MTAtU3RyaWtlIFNvZnR3YXJlMSQwIgYJKoZIhvcNAQkBFhVzdXBwb3J0QDEwLXN0
...
xEDGxy6A+grWMG7p8Ct/KIIz0dUeoJRw8kQvV/eZsOIBiWfVo8OsEdBgShobZupG
560vPhTn6pode036YdDHMQ==
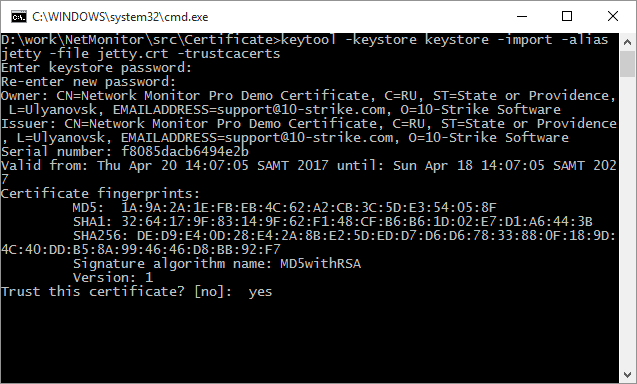
-----END CERTIFICATE----- - Run the 1_import_crt.bat file.
Specify a password for the Jetty password storage and confirm it. Record this password for further configuration.
Respond "yes" to the question about the certificate trust. A new file named keystore will appear in the folder. This is the Jetty password storage file with your certificate added.
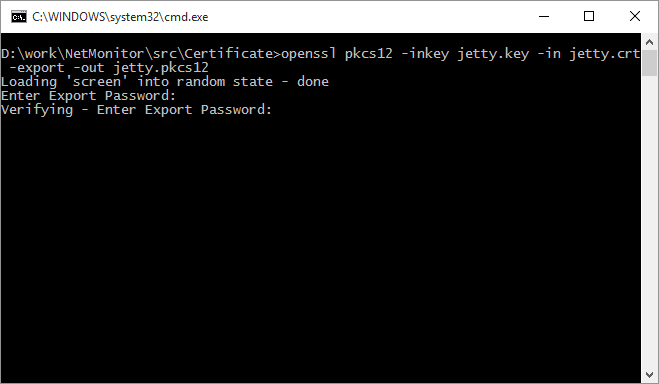
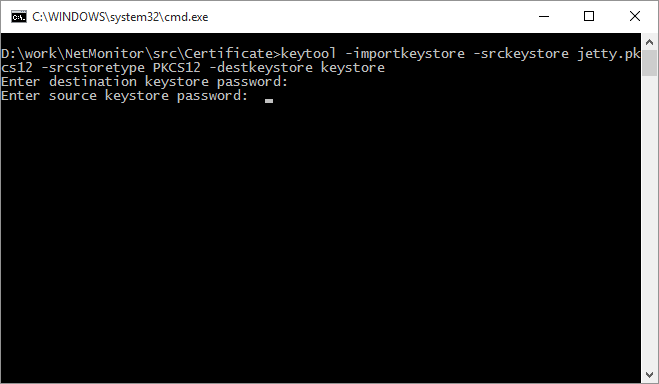
- Now you need to convert the .crt and .key files to the PKCS12 format before loading them to the created storage. Run the 2_make_pks.bat file.
Enter your storage password and confirm it. A new file called jetty.pkcs12 will appear in the folder. It contains the key and the certificate both.
- Load it to the storage by running the 3_load_keys.bat file.
Enter the storage password twice. As a result of the operation, size of the keystore file will change. The file will be copied to the c:\Program Files (x86)\10-Strike Network Monitor Pro\web\etc\ folder. Please check this (check the file date/time).
- Open the c:\Program Files (x86)\10-Strike Network Monitor Pro\web\etc\jetty-ssl-context.xml file in any text editor.
Find these strings:
<Set name="KeyStorePassword">...
<Set name="KeyManagerPassword">...
<Set name="TrustStorePassword">...
They contain a password for the key storage. This password is stored in the encoded form (obfuscated): OBF:1kfx1k8c1ym91wn11y0q1vno1vne1y101wn51ym51k5u1kch.
You need to replace old existing passwords with the new password you created on the previous steps in the encoded format.
- To encode your password, open the 4_make_password.bat file in a text editor and replace the "netmonitor" password to your actual key storage password.
Save and start the 4_make_password.bat file. If the command works out successfully, you will see the following text on the console:
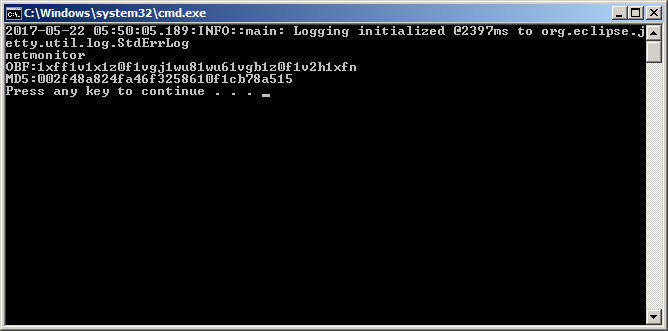
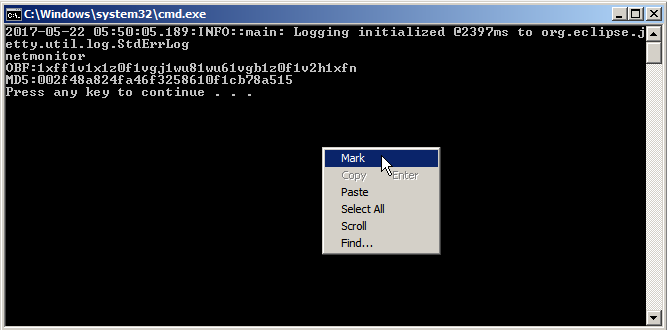
- Click on the console window using the right mouse button and select the Mark item in the context menu. Select that encoded password text starting from the "OBF" word to copy it to the clipboard like it is shown below.
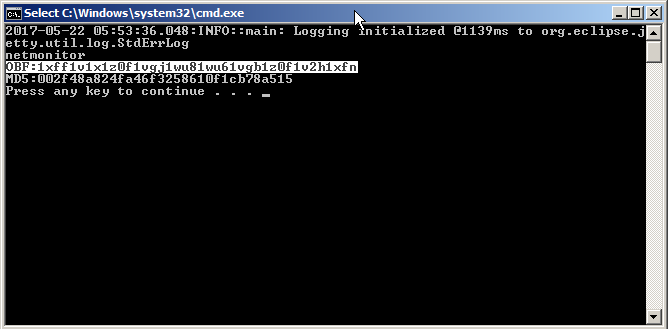
- Paste that encoded password from the clipboard to the text editor instead of the text in quotes and save the jetty-ssl-context.xml file.
- Run the 5_config_and_restart.bat file. It replaces the current Jetty configuration file start.ini in the folder c:\Program Files (x86)\10-Strike Network Monitor Pro\web\ to the new file with enabled HTTPS settings and restarts the Jetty service.
- Run your web browser and open URL: https://localhost:8443/netmonitor/
Now you are working with the program's web UI through the secure connection. You should see the lock icon on the address panel.
You can find more information on the HTTPS configuration in Jetty here: https://wiki.eclipse.org/Jetty/Howto/Configure_SSL#Loading_Keys_and_Certificates