You can start generating reports by clicking the main menu item "Reports - Create report" (or the context menu item "Create report", or the toolbar button). That will open the Report Creation Wizard which is described below. Read about other methods of creating hardware and software reports here...
Report Creation Wizard
1. Using, Creating, and Editing Templates
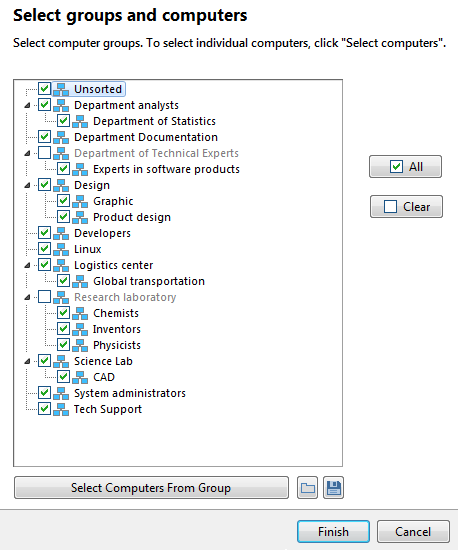
Select the needed computers. Uncheck the "Collect new data and update the database" setting if you want to create the report with the data available locally and save time. Click "Next".
On the next screen, the "Templates" and "Quick Report" tabs will be displayed.

1. The "Templates" tab allows you to select a standard or a custom template and create a report with its help. Select a template and click "Finish".
Working with Report Templates
The program allows using templates for creating reports. Templates can save your time when you create complex reports.
Click "Delete" to delete the selected report template.
Click "New" to create a new report template.
Click "Edit" to view or edit the selected template.
If you click the New or Edit buttons, the template window will appear:
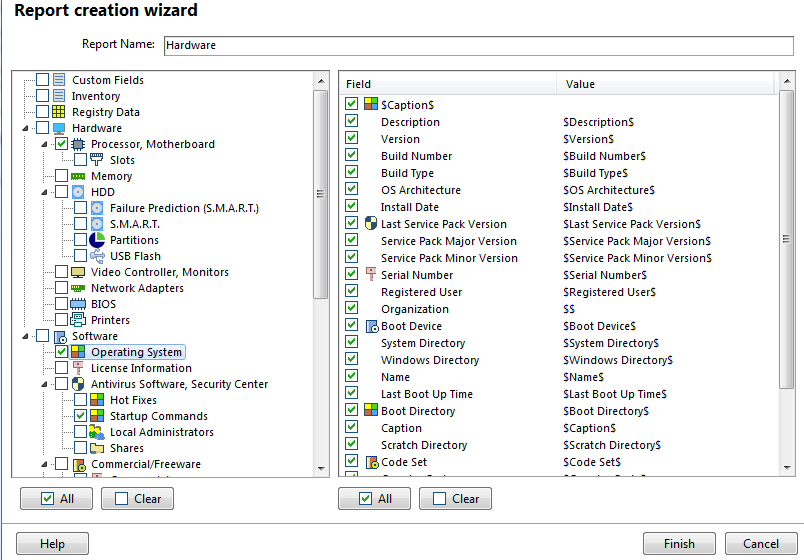
The left part of the report editor window displays groups of data which you can include in the report. The right part of the window displays data to be included in the report for each selected data group.
The "Report name" will be printed on the report header. If the field is empty, it will be filled in automatically when you select the first data group.
Click "Finish" to save the template.
The created or edited template will be selected in the list of templates. Select a template and click "Finish" to create the report.
2. The "Quick Report" tab allows you to quickly select the necessary configuration items and create a report. If you want to exclude some details from the report, use a template for that. The templates allows you to configure items to be included in the report more detailed.
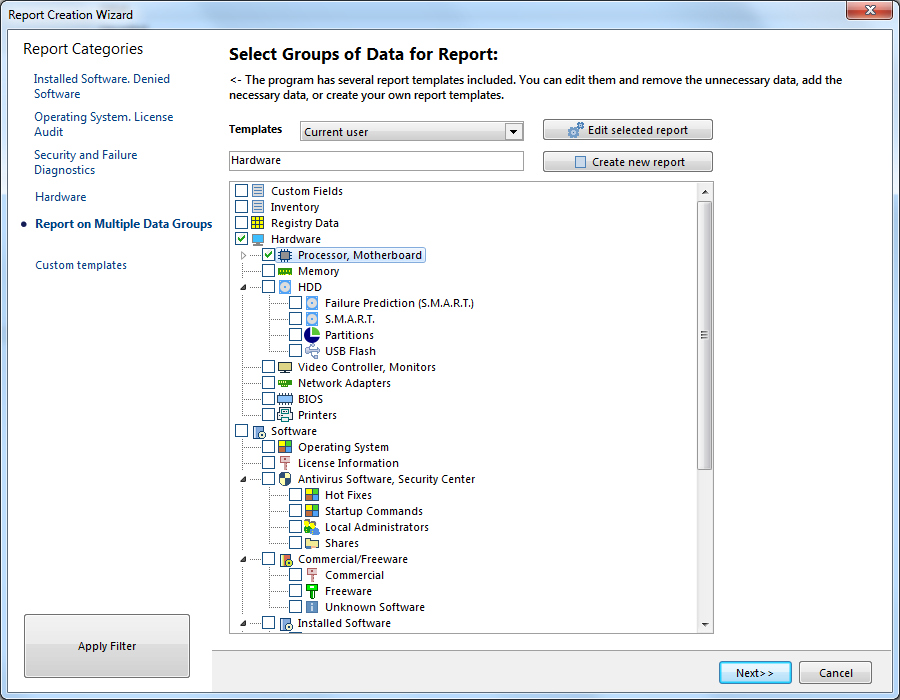
Select configuration items to be included in the report. The "Report name" will be printed on the report header. If the field is empty, it will be filled in automatically when you select the first data group.
Click "Finish" to create the report. After the report creation, the preview window will be displayed where you can print or save the report.
You can create separate reports for several different computers at a time (without a preview). In order to do this, click the Next>> button instead of the Finish button on the previous step. The last step of the Wizard will be shown.
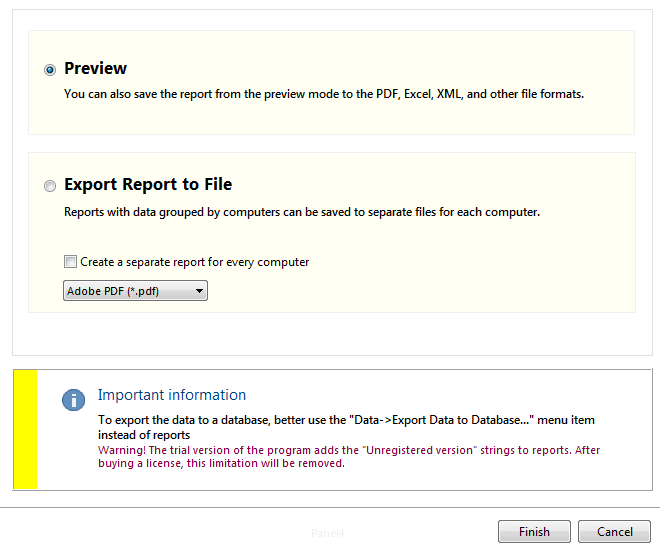
1) Select the Export report to file... option.
2) The program has two report generators that you can use: (a) a third-party generator named FastReport and (b) our own alternative generator. The first generator is good for previewing and printing good-looking reports. However, it can be quite difficult to edit such reports. If you want to store created reports for further editing, it will be better to use the alternative generator. The alternative generator cannot create PDF reports and cannot make a preview. You can try both generators and see which one is better for you.
Select the Use an alternative report generator... setting in order to use our own generator, or deselect it to use the FastReport generator.
3) Select a file format for saving reports.
4) (a) If you need a common report for all selected computers in a single file, deselect the Create a separate report for every computer setting. Below, configure path and name for the file.
(b) If you need separate reports for different computers, select the Create a separate report for every computer setting. The files will be named according to the File Name Template parameter and will be placed in a specified path for writing reports.