Getting started
The main window contains three tabs:
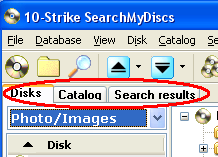

See Interface for more details.
1. Start the group editor (select the Group editor item on the Service menu; use the Ctrl-G key combination or the
See Group editor for details.
2. Scan one or more (preferable) disks. This allows you to see most of the program's features. Insert a CD or DVD into your drive. The program will inquire whether you would like to scan that disk. Select Yes at the prompt or select the Scan disk item on the Disk menu. Or click
When the scanning is completed, the disk properties window will appear. Select the groups you would like the disk to belong to, edit the disk's title and other properties, add description and memo if necessary.
See Scanning disk and Disk properties for details.
3. Instead of scanning a disk, you can scan a folder. To scan a folder: select the Scan folder item on the Disk menu or click
See Scanning folder for details.
After having your disks scanned you can:
1. View the disks' file structure.
2. Find files on the disks.
3. Generate report on the files.
4. Place files and folders to the tree-like file catalog.
Now you can quickly find information on any disk and its contents even when your collection of disks consists of 300-500 or more disks.