Getting Started with the Program
![]() Launch the program
Launch the program
The Network Map Creation Wizard should start.
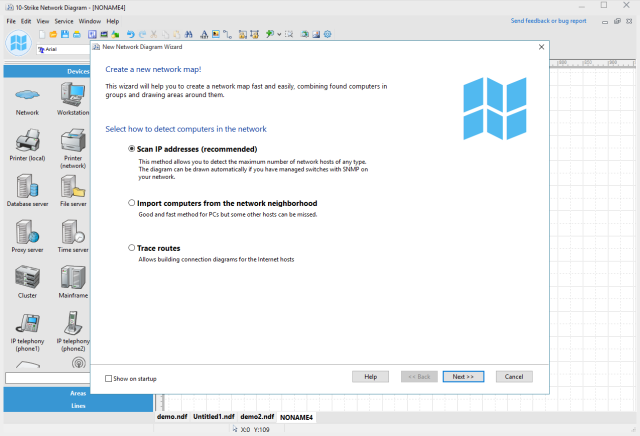
Follow the instructions which are displayed on the screen, and you are able to create your network map quickly and easily. Allow the program to work through your firewall, if the need arises. The wizard is quite simple and intuitive. It allows scanning IP address ranges and Windows networks both. You should see the window offering you two options:
1. Scanning IP range
This method allows you to spot the maximum number of devices. It features the following advantages:
- High scanning speed ( ~16 addresses/sec. at optimal[1] settings)
- Recognition of diverse hardware types: printers (local and network), switches, hubs, servers, database servers, routers, WiFi access points, etc.
- Combination of several efficient network hardware search methods (ICMP ping, scanning a series of TCP ports, ARP requests)
- Retrieving data from hardware via SNMP (switches, printers, WiFi, etc.)
- Automatically building a network map by drafting over data received from switches.
- Automatic retrieving of additional information on found hosts (IP and MAC addresses, NIC manufacturer, DNS name, OS type, connected printers, descriptions.)
- Scanning several IP ranges at once.
- When found devices are placed on the map, they are automatically scheduled for specific automatic checks.
If you have a large switched network, it is recommended that you use this scanning method.
2. Importing from Network Neighborhood
This method works somewhat faster than the other one; however, not all devices are guaranteed to be found. Moreover, using this method the program will not be able to build the network map automatically. Still, it will automatically place found computers to groups, depending on workgroups and domain names the computers belong to.
![]() Run the Scanning process
Run the Scanning process
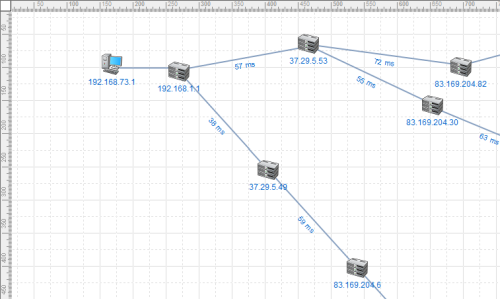
The time required for completion of the scanning depends on your network's performance and may range from a fraction of a second through several seconds or minutes (in case of scanning big IP address range). Once it is complete, you will see domains/workgroups (you explore them by double-clicking on them) or hosts (in case of scanning IP range) listed on the map. You can also arrange them on the map any way you like by selecting several items together and dragging them with the mouse.
![]() Add lines and regions to the map
Add lines and regions to the map
It is recommended that you draw lines connecting hosts to make your map more readable. You can group hosts inside regions (for example, regions may represent rooms or buildings) easing up locating needed object on map. Read how to draw lines and regions here.
![]() Save the map
Save the map
The map can be saved to a file. Maps, added to the Maps list, will be loaded automatically on the next program start (until you close the map files).
![]() Use the context menu, toolbar, and main menu to access the program's functions.
Use the context menu, toolbar, and main menu to access the program's functions.
All of the program's functions are available via the context menu, toolbar and main menu and are described below in this manual.
[1]How to configure optimal scanning settings
The perfect choice of search parameters depends on your network configuration, availability and functioning of the necessary protocols. In particular, to detect hosts in a local area network with bandwidth of 100 Mbps and higher, it will be sufficient for two ping packets and 100-500 ms response. In the case with TCP ports, it is worth noticing that the greater number of ports you specify on the list, the longer the application will search for hosts in the network. The best way to go around this is to set 2-3 of the most common ports through which the application can find Windows stations and servers; those include 139, 135, 21 and 80th (NetBIOS, DCOM, FTP, HTTP).
Searching for network printers is a different story. This procedure takes quite a bit of time, and therefore it should not be run if you are SURE that there are no such printers in your network. Otherwise, you would have to wait for the completion of that procedure. The completion will be indicated by the appearance of the network scanning progress bar in the network scanning wizard window. The reason why the procedure is so slow is because it searches for network printers BEFORE launching the primary scanning procedure (which is performed with a large number of threads running simultaneously, unlike with searching for printers).
This is also true for obtaining additional information on hosts through NetBIOS. If the NetBIOS protocol is disabled in your network, no such information can be retrieved, and the application will spend quite a bit of time on that attempt (hence the feeling that the application is frozen). Searching for network switches is done in the multithreaded mode. However, if you specify a large number of possible community string values, that will also slow down the scanning process. Hence, if you have set the scanning parameters, and the application is scanning too slow or, even worse, completely "frozen" go ahead and disable some of those parameters (first, disable network printer search and then disable obtaining additional information through NetBIOS) and try launching the scanning procedure again.