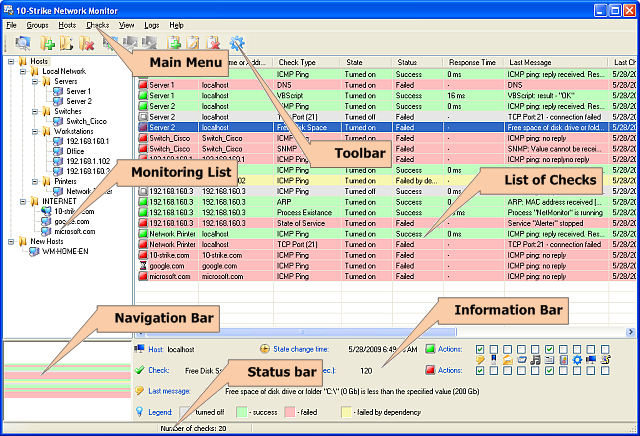
The main window of the program contains the main menu, toolbar, list of hosts to be monitored, list of checks, navigation bar, information bar, and status bar.
Main menu
From the applications main menu, you can call all functions available in the application.
![]() From the File menu, you can:
From the File menu, you can:
2. Connect to the server
3. Edit the applications settings
4. Exit from the application

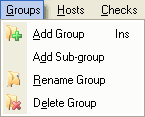
![]() From the Groups menu, you can:
From the Groups menu, you can:
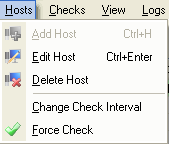
![]() From the Hosts menu, you can:
From the Hosts menu, you can:
4. Edit check interval for selected host
5. Force check for selected host
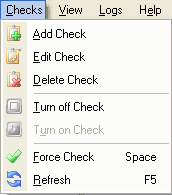
![]() From the Checks menu, you can:
From the Checks menu, you can:
6. Update the list of checks
![]() From the View menu, you can:
From the View menu, you can:
1. Show/hide the information bar
2. Show/hide the navigation bar
![]() From the Logs menu, you can:
From the Logs menu, you can:
1. View the alert log
2. View the Windows Event Log
![]() From the Help menu, you can:
From the Help menu, you can:
1. View this help
2. View information about the application
3. Other helpful information about the application
Toolbar
The toolbar contains buttons that provide a quick-access to the most used functions of the application.
List of hosts to be monitored
The monitoring list contains hosts united into groups (folders) in the tree-like form. You can set any number of checks for each host. Selecting a specific host on the tree makes the check list show only the checks that belong to the host. When a group is selected, the check list displays all checks contained within this group of hosts.
Check list
The list of checks shows check records for the group or host selected on the tree.
Navigation bar
If the number of checks on the list is too great so that they do not fit in the visible area of the list, you can navigate through them easily using the navigation bar. Generally, the navigation bar is a reduction of the check list. Navigation bar allows responding to a check failure promptly, as a record highlighted with red color can be seen easily despite that it is outside the visible area of the list. You can hide the navigation bar by clearing the checkbox by the View | Navigation Bar item on the main menu.
Information bar
The information bar shows current state of the check selected on the check list and some of its properties in a convenient format. Besides that, by selecting the necessary option on the Actions field, you can quickly change the applications response to the check result. You can hide the information bar by clearing the checkbox by the View | Information Bar item on the main menu.